How to Collimate a Telescope (Newtonian Reflector)
How to Collimate a Telescope (Newtonian Reflector)
Learning how to collimate a telescope is the single skill that separates a Newtonian reflector that shows crisp, contrasty views from one that shows soft, smeared blobs. Collimation simply means aligning the two mirrors so light travels straight down the tube and into your eye. Reflectors drift out of alignment with every car journey and every knock, so this is not a one-off job, it is routine maintenance you will do again and again. The good news: on a typical beginner Dobsonian or reflector it takes a few minutes once you know what you are looking at.
This guide covers the tools worth owning, what a collimated telescope actually looks like down the focuser, and the exact order of adjustments. Refractors and most smart telescopes do not need this, so if you own one of those you can skip it. If your views are stubbornly fuzzy even after collimating, read our companion piece on why a telescope shows a blurry image as well.
What collimation actually means
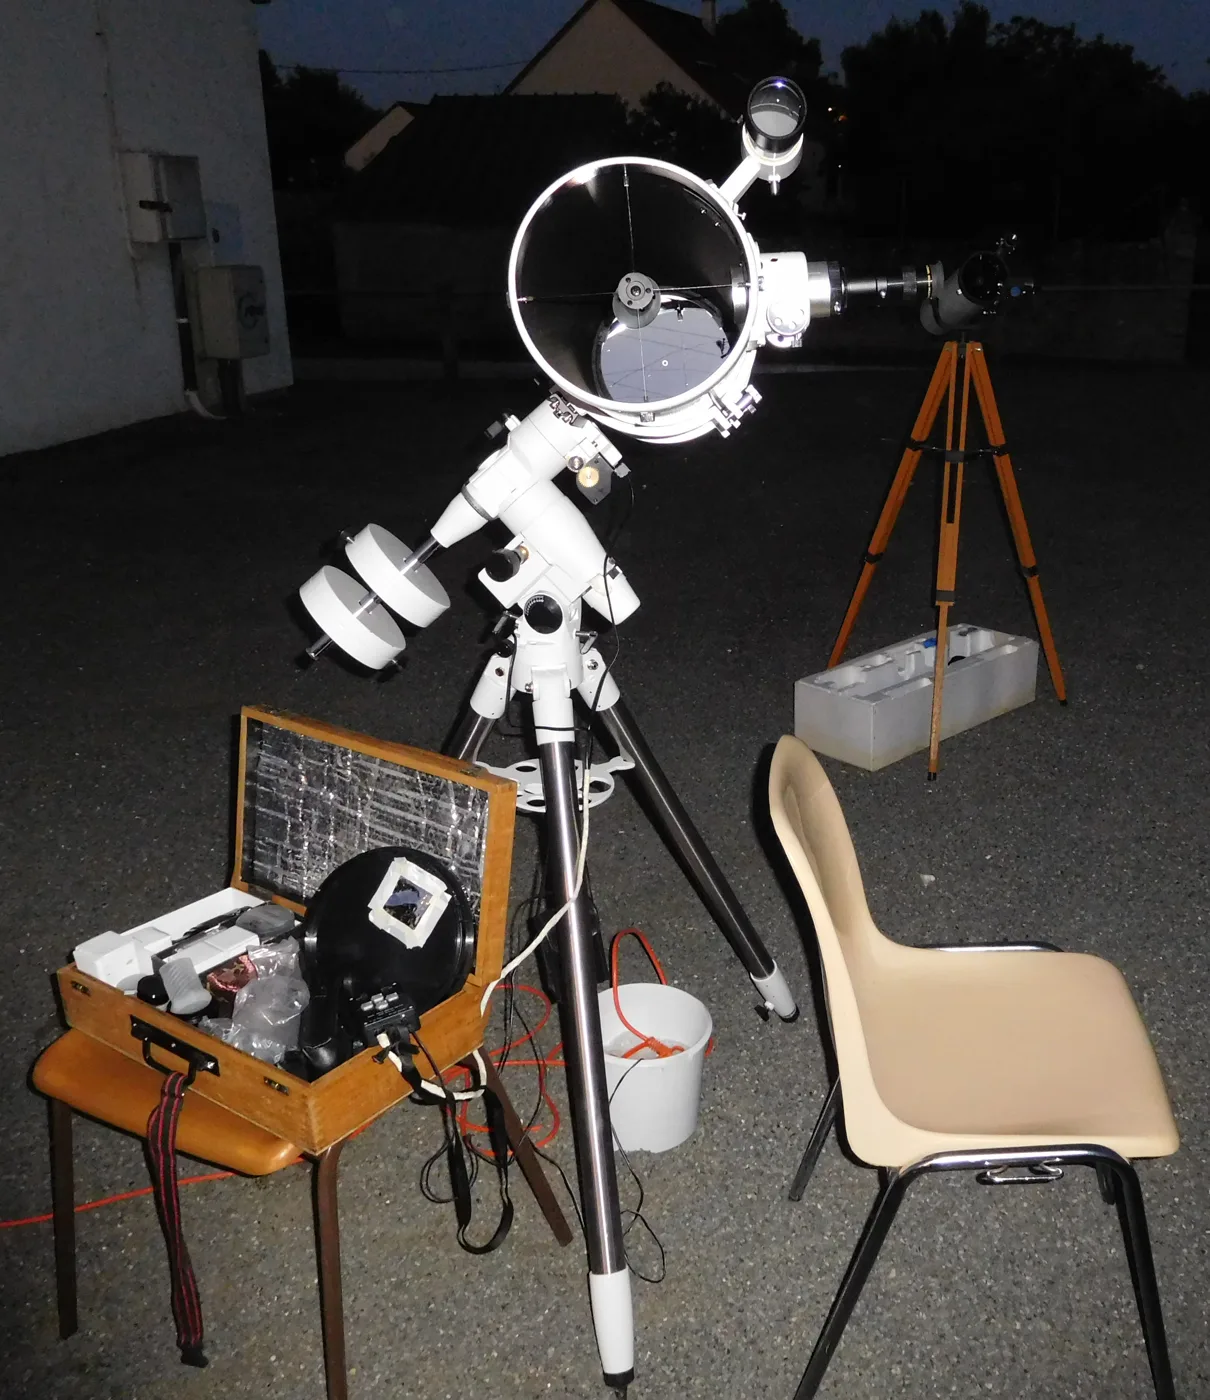
A Newtonian has two mirrors. The large concave primary mirror sits at the bottom of the tube. The small flat secondary mirror sits near the top at 45 degrees and bounces the light out through the side into your focuser. Collimation is the act of getting three things to line up: the focuser axis, the centre of the secondary, and the centre of the primary, so they all share one straight optical path. When they do, a star snaps to a tight point. When they do not, it flares into a comet shape and detail vanishes.
Most primary mirrors made in the last decade have a small ring or dot stuck to the exact centre, the centre spot. That spot is your target throughout, and it is why you never need to look at an actual star to get most of the way there.
The tools, from cheapest to best
- Collimation cap: a simple cap with a small central peephole that fits the focuser. It costs almost nothing, and for beginners with slower telescopes (around f/5 and above) it is genuinely adequate. Some scopes ship with one.
- Cheshire eyepiece: the workhorse most experienced observers reach for. It is a sight tube with an angled, brightly lit face that reflects into the mirrors, giving you clear crosshairs and a bright ring to line the centre spot against. It needs no batteries and never goes out of alignment itself.
- Laser collimator: fires a beam down the focuser and shows the error as a dot on a target. Fast and satisfying, but only as good as your focuser. Cheap, sloppy focusers let the laser wobble, giving false readings, so a laser suits scopes with a solid focuser and benefits from being checked for its own alignment first.
For a first tool, a Cheshire or a simple cap is the honest recommendation. A laser is a nice upgrade, not a starting point. Sky & Telescope has a good overview of the collimation tool types if you want to compare before buying.
Step 1: Set up indoors, in daylight
You do not need the night sky for the main work. Point the tube at a bright, evenly lit wall or the daytime sky, and work somewhere you can sit comfortably with the focuser at a sensible height. Have a screwdriver or hex key ready for whatever your mirror screws take, and check first whether your secondary and primary adjusters use thumbscrews, cross-head screws or Allen bolts.
Step 2: Align the secondary mirror
Slot your collimation cap or Cheshire into the focuser and look through it. You are checking that the secondary mirror is round, centred under the focuser, and that you can see the whole primary mirror reflected in it.
Adjust the three small screws on the secondary mirror holder until the reflection of the primary is fully visible and centred in the secondary. On many scopes the secondary also needs to sit slightly offset away from the focuser, but for beginner alignment the priority is simply seeing the entire primary, centred, with no part cut off. This step is the fiddliest, but once set it rarely needs redoing, so take your time here.
Step 3: Align the primary mirror
This is the step you will repeat most often, and it is the easy one. Still looking through the tool, find the primary mirror’s centre spot. Using the collimation screws at the back of the tube (usually three larger adjusters, sometimes with locking screws you must loosen first), tilt the primary until its centre spot sits dead centre under the crosshairs or peephole.
With a Cheshire, the goal is to get the centre spot’s shadow, the bright ring of the Cheshire and the crosshairs all concentric, stacked one inside the other. With a laser, you simply walk the returning dot into the bullseye on the target. Nudge one screw at a time and watch which way the spot moves, then correct. Re-tighten any locking screws gently when you finish, and recheck, since locking can shift the alignment slightly.
Step 4: Confirm on a real star
To fine-tune, wait for a clear night, point at a moderately bright star and centre it, then defocus slightly with a high-power eyepiece. You should see a set of concentric rings around a central dot, like a tiny archery target. If those rings sit evenly all the way round, you are collimated. If they bunch to one side, nudge the primary screws until they even out. This “star test” is the final polish, not the main job.
How often should you collimate?
Check before every session if you transport the scope, because the vibration of a car boot is enough to shift a primary. A permanently set-up scope holds alignment far longer. The check itself takes seconds once you know the concentric look you want, and only actual drift needs correcting. Building the habit of a 30-second look through a Cheshire before you observe will save you from blaming the sky, or the telescope, for softness that is really just misalignment.
Once your optics are sharp, the next thing standing between you and good views is usually the target list. See our guides on the best things to see with a beginner telescope and how to find planets and stars by star hopping.
Frequently asked questions
Do I need to collimate a telescope, or is it optional? For a Newtonian reflector it is not optional if you want sharp views. The mirrors drift out of alignment with handling and transport, and even a small error visibly softens the image. Refractors, catadioptric scopes and most smart telescopes hold alignment far better and rarely need user collimation.
Can I collimate a telescope without any tools? You can get roughly aligned by eye through the empty focuser, but it is imprecise. A collimation cap costs very little and makes the job far more accurate, so it is worth buying one before your first proper session. A Cheshire is the better long-term tool.
Is a laser collimator better than a Cheshire eyepiece? Not necessarily. A laser is faster, but it only reads true through a solid, slop-free focuser, and the laser itself must be aligned first. On cheaper beginner scopes a Cheshire or simple cap is often more reliable. Many experienced observers keep both and use the Cheshire as the reference.
How often does a reflector telescope need collimating? Check every time you set up if you move the telescope by car, since vibration shifts the primary mirror. A scope kept assembled and undisturbed can hold collimation for weeks. The check takes seconds, so make it a habit even when nothing has obviously changed.
Why does my telescope still look blurry after collimating? Collimation is only one cause of soft views. Poor atmospheric “seeing”, a scope that has not cooled to outside temperature, cheap eyepieces, or simply too much magnification for the conditions all blur the image too. Work through those before assuming the collimation is off again.
Clear skies forecast? Get a nudge.
Our weekly email flags the next good UK observing window and one easy target to find.
Join the listMore from Starvest
Keep reading
Best Telescopes for Beginners in the UK (Tested by Price Bracket)
The best beginner telescopes in the UK by budget, from sub-£150 tabletop scopes to app-guided and smart telescopes, with real 2026 prices.

What Can You See with Binoculars at Night? A Realistic Astronomy List
A realistic list of what you can see with binoculars in astronomy, from the Moon and Jupiter's moons to Andromeda, with tips for spotting each from the UK.

How to Set Up and Use Your First Telescope (Step by Step)
How to use a telescope as a beginner: assemble the mount, align the finder, focus, and find your first targets. A clear step-by-step UK guide.